Gorgeous vacation photos can help you remember an incredible experience forever. Thankfully, the capabilities of today's smartphones make capturing memorable photos easy—a lifesaver when traveling! Use these eleven phone photography tips to take professional-looking vacation photos on your next getaway. And if you’re looking for scenic locations for your photos, don’t forget to book at a stay at our resorts for gorgeous backgrounds and luxurious accommodations.
Lighting & Location for Vacation Photos
Two fundamentals of great vacation photos, no matter if it's with your phone or a regular camera, are lighting and location. Finding a beautiful location while on vacation won't be difficult, but finding great light may be a challenge. If you're shooting outdoors, it's true that early morning (right before the sun rises) and late afternoon (an hour or so before the sun sets, aka "golden hour") are the best times to snap some well-lit photos without harsh shadows on your subject. But when you're on vacation, you might be sightseeing in the middle of the day when the sun is at it's brightest. What do you do then? Avoid a great picture? No way! You look for open shade.
Open shade is an area that's shaded from direct sunlight but is still illuminated by reflected light. For example, if your subject is standing in the shade of a building or big tree (facing away from the building or tree) and can see the sky when they look up, that's open shade. If there's a white or neutral-colored wall/building, road, sidewalk, etc. near your open shade, that's even better! It will act as a natural reflector and bounce light onto your subject, giving them beautiful radiance and nice catchlights (or sparkle) in their eyes.
If you can't find open shade when the light is harsh, the next best option is to have your subject turn their back to the sun and you (the photographer) shoot towards them. If you're in line with their shadow, you're in the right position. This will create a nice rim of light around their head and will ensure their face and body is evenly lit.
Use Grid Lines
Once you've chosen the best light, location, and subject, you'll need to place that person or object within your smartphone's camera frame. One of the easiest ways to do so is by setting your phone's camera to show grid lines which create a 3 x 3 grid across the screen. Try placing your subject so that it occupies the right or left third of the frame instead of the center of the frame. This is called the "rule of thirds," and it helps make vacation photos more interesting and dynamic. Grid lines on the iPhone can be found under Settings > Camera > Grid. For Android phones, go into the settings of your camera app and turn on the assistive grid.
Get the Exposure Right
Problems with exposure, or how much light is allowed through the camera lens, are common with phone photography. Thankfully, you can often overcome some lighting problems simply by tapping on the subject of your photo to ensure that your camera's lens is focused. If you don't focus on your subject, your camera can't make smart lighting decisions. You should also avoid using the flash on your smartphone unless absolutely necessary as it can undermine photo quality.
Say Hello to the Exposure Compensation Tool
Of course, there are times when focusing on your subject isn't enough to overcome exposure issues. In these situations, you should use manual exposure compensation tools instead. These tools allow you to make real-time exposure adjustments just like you would on a film camera. You can read up on exposure compensation tools on the iPhone, or find a manual camera app for your Android phone if it doesn’t already have this function.
Get a New Perspective
You've chosen the perfect subject for your photo and you're framing the shot, but something just doesn't look right. It might be time to change your perspective. Try moving to a different location or using a selfie stick to shoot your subject from another angle. Check out our post on fall family photos to learn more about how camera angles will affect your shot.
Give Your Shot a Good Foundation
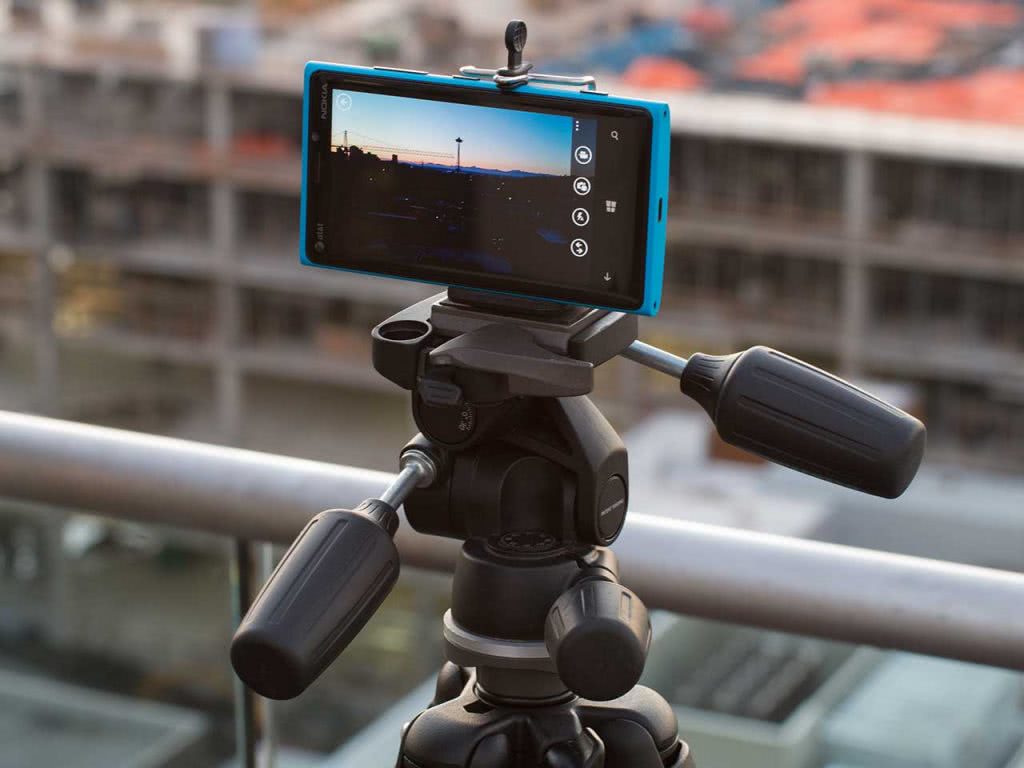
Stabilizing your phone is an absolute must if you want to take professional-quality vacation photos. You may be able to use nearby objects or a selfie stick, but a smartphone tripod is the best way to ensure that your phone doesn't move during shooting. It's particularly important to stabilize your phone at night or in low-light situations. Doing so will help avoid the motion blur that often affects phone photography.
Make Use of the Light Around You
In the world of film photography, lighting is often used to tell a story. You can also use lighting to craft a strong narrative if you're practicing phone photography. Instead of looking to your phone's internal flash for help, look at the world around you. Natural lighting is the best choice for lighting people, animals, and other organic subjects. Try taking photos at different times of day to see how your natural lighting options change as the sun travels through the sky.
Celebrate Negative Space
In photography, all of the space that surrounds the photo's main subject is called negative space. It functions as a type of background that helps the subject of your photo stand out from everything else. If you're relying on phone photography during your vacation, mastering negative space provides an easy and powerful way to take your shots to the next level. Don't be afraid to take a shot of an exotic bird against an empty sky or a friend standing in a drift of endless white sand.
Skip the Temptation to Zoom
When you use a traditional film camera, you likely zoom in on your subject. This is a big no-no with phone photography, though, because your phone doesn't really have the capability to zoom. It simply pre-crops your photo, which can lead to quality issues. If you are going on vacation and know that you'll need to zoom in on subjects, opt for a detachable smartphone camera lens.
Make Quick Edits
When all else fails, try editing your vacation photos to make them look more professional. Editing programs are especially helpful if you need to overcome exposure or color saturation issues. Some of the most popular Android and iPhone photo editing apps include:
Keep It Simple
The best phone photography is often the most simple. If you're struggling to compose the perfect shot, take a step back and remember to keep it simple. Fancy filters and effects aren't needed to capture the raw, natural beauty of everyday life on your vacation.
Owners, visit The Lounge for more information or to book a reservation.


